Step 2 — Setting up a MySQL Database
Let's now create a MySQL database that we'll use to persist data in our Laravel application. In your terminal, run the following command to run the mysql client:
When prompted, enter the password for your MySQL server when you've installed it.
Next, run the following SQL statement to create a db database:
mysql> create database db;
Open the .env file and update the credentials to access your MySQL database:
DB_CONNECTION=mysql
DB_HOST=127.0.0.1
DB_PORT=3306
DB_DATABASE=db
DB_USERNAME=root
DB_PASSWORD=******
You need to provide the database name, the username and password.
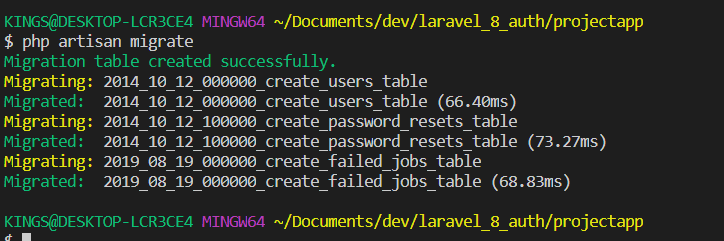
At this point, you can run the migrate command to create your database and a bunch of SQL tables needed by Laravel:
Note: You can run the migrate command at any other points of your development to add other SQL tables in your database or to later your database if you need to add any changes later.
Step 3 — Creating a Database Migration
We'll be creating a CRUD application with Laravel 8 for a products app so we'll need to create the corresponding SQL table in the database using a migration.
Head back to your terminal and run the following commands:
$ cd laravel8app
$ php artisan make:migration create_products_table --create=products
A migration file will be created inside the database/migrations folder of your product, next we need to add the fields to our database table. A product will have a name, description, price, date created, and date updated.
Open the 2020_09_12_222716_create_products_table.php file that contains the migration class and update it as follows:
<?php
use Illuminate\Database\Migrations\Migration;
use Illuminate\Database\Schema\Blueprint;
use Illuminate\Support\Facades\Schema;
class CreateProductsTable extends Migration
{
/**
* Run the migrations.
*
* @return void
*/
public function up()
{
Schema::create('products', function (Blueprint $table) {
$table->id();
$table->string('name', 255)->nullable();
$table->string('description', 500)->nullable();
$table->decimal('price', 22)->nullable()->default(0.00);
$table->timestamp('created_at')->useCurrent();
$table->timestamp('updated_at')->nullable();
});
}
/**
* Reverse the migrations.
*
* @return void
*/
public function down()
{
Schema::dropIfExists('products');
}
}
To avoid running into errors, you need to specify the default string length before running your migration.
Open the app/Providers/AppServiceProvider.php file and add Schema::defaultstringLength(191) as follows:
<?php
namespace App\Providers;
use Illuminate\Support\ServiceProvider;
use Illuminate\Support\Facades\Schema;
class AppServiceProvider extends ServiceProvider
{
/**
* Register any application services.
*
* @return void
*/
public function register()
{
//
}
/**
* Bootstrap any application services.
*
* @return void
*/
public function boot()
{
Schema::defaultStringLength(191);
}
}
Next, head back to your terminal and run the following command:
This will add the fields to our database table.
Step 4 — Adding a Resource Route
After creating our database table using a Laravel 8 migration. We'll next need to add routes for our CRUD operations.
Open the routes\web.php file and add our resource route as follows:
<?php
use Illuminate\Support\Facades\Route;
use App\Http\Controllers\ProductController;
Route::get('/', function () {
return view('welcome');
});
Route::resource('products', ProductController::class);
Step 5 — Adding a Laravel 8 Controller and Model
Next, we need to create a Laravel controller and model by running the following command:
$ php artisan make:controller ProductController --resource --model=Product
You'll be prompted if you want to create the Product model because it does not exist. Type yes and it will create the model and controller.
Open the app/Http/Controllers/ProductController.php file and update it as follows:
<?php
namespace App\Http\Controllers;
use App\Models\Product;
use Illuminate\Http\Request;
class ProductController extends Controller
{
/**
* Display a listing of the resource.
*
* @return \Illuminate\Http\Response
*/
public function index()
{
$products = Product::latest()->paginate(5);
return view('products.index', compact('products'))
->with('i', (request()->input('page', 1) - 1) * 5);
}
/**
* Show the form for creating a new resource.
*
* @return \Illuminate\Http\Response
*/
public function create()
{
return view('products.create');
}
/**
* Store a newly created resource in storage.
*
* @param \Illuminate\Http\Request $request
* @return \Illuminate\Http\Response
*/
public function store(Request $request)
{
$request->validate([
'name' => 'required',
'description' => 'required',
'price' => 'required'
]);
Product::create($request->all());
return redirect()->route('products.index')
->with('success', 'Product created successfully.');
}
/**
* Display the specified resource.
*
* @param \App\Models\Product $product
* @return \Illuminate\Http\Response
*/
public function show(Product $product)
{
return view('products.show', compact('product'));
}
/**
* Show the form for editing the specified resource.
*
* @param \App\Models\Product $product
* @return \Illuminate\Http\Response
*/
public function edit(Product $product)
{
return view('products.edit', compact('product'));
}
/**
* Update the specified resource in storage.
*
* @param \Illuminate\Http\Request $request
* @param \App\Models\product $product
* @return \Illuminate\Http\Response
*/
public function update(Request $request, Product $product)
{
$request->validate([
'name' => 'required',
'description' => 'required',
'price' => 'required'
]);
$product->update($request->all());
return redirect()->route('products.index')
->with('success', 'Product updated successfully');
}
/**
* Remove the specified resource from storage.
*
* @param \App\Models\Product $product
* @return \Illuminate\Http\Response
*/
public function destroy(Product $product)
{
$product->delete();
return redirect()->route('products.index')
->with('success', 'Product deleted successfully');
}
}
Laravel 8 makes use of a Models folder for storing model files.
Open the app/Models/Product.php, add the following functions and the fillable, the fillable are the fields in the database that a user can fill:
<?php
namespace App\Models;
use Illuminate\Database\Eloquent\Factories\HasFactory;
use Illuminate\Database\Eloquent\Model;
class Product extends Model
{
use HasFactory;
protected $table = 'products';
public $timestamps = true;
protected $casts = [
'price' => 'float'
];
protected $fillable = [
'name',
'description',
'price',
'created_at'
];
}
Step 6 — Adding your Larevl 8 Blade Views
Laravel makes use of the blade templating system for views.
Inside the resources/views folder, create two Layouts and Products folders.
Update yhe Layouts/App.blade.php file with the following content:
<html>
<head>
<title>App Name - @yield('title')</title>
<!-- Bootstrap -->
<link href="https://cdnjs.cloudflare.com/ajax/libs/twitter-bootstrap/4.0.0-alpha/css/bootstrap.css" rel="stylesheet">
<!-- Font Awesome JS -->
<script defer src="https://use.fontawesome.com/releases/v5.0.13/js/solid.js"
integrity="sha384-tzzSw1/Vo+0N5UhStP3bvwWPq+uvzCMfrN1fEFe+xBmv1C/AtVX5K0uZtmcHitFZ" crossorigin="anonymous">
</script>
<script defer src="https://use.fontawesome.com/releases/v5.0.13/js/fontawesome.js"integrity="sha384-6OIrr52G08NpOFSZdxxz1xdNSndlD4vdcf/q2myIUVO0VsqaGHJsB0RaBE01VTOY" crossorigin="anonymous">
</script>
<style>
.footer {
position: fixed;
left: 0;
bottom: 0;
width: 100%;
background-color: #9C27B0;
color: white;
text-align: center;
}
</style>
</head>
<body>
@section('sidebar')
@show
<div class="container">
@yield('content')
</div>
</body>
</html>
Open the Index.blade.php and update it as follows:
@extends('layouts.app')
@section('content')
<div class="row">
<div class="col-lg-12 margin-tb">
<div class="pull-left">
<h2>Laravel 8 CRUD Example </h2>
</div>
<div class="pull-right">
<a class="btn btn-success" href="" title="Create a product"> <i class="fas fa-plus-circle"></i>
</a>
</div>
</div>
</div>
@if ($message = Session::get('success'))
<div class="alert alert-success">
<p></p>
</div>
@endif
<table class="table table-bordered table-responsive-lg">
<tr>
<th>No</th>
<th>Name</th>
<th>description</th>
<th>Price</th>
<th>Date Created</th>
<th>Actions</th>
</tr>
@foreach ($products as $product)
<tr>
<td></td>
<td></td>
<td></td>
<td></td>
<td></td>
<td>
<form action="" method="POST">
<a href="" title="show">
<i class="fas fa-eye text-success fa-lg"></i>
</a>
<a href="">
<i class="fas fa-edit fa-lg"></i>
</a>
@csrf
@method('DELETE')
<button type="submit" title="delete" style="border: none; background-color:transparent;">
<i class="fas fa-trash fa-lg text-danger"></i>
</button>
</form>
</td>
</tr>
@endforeach
</table>
{!! $products->links() !!}
@endsection
Open the create.blade.php file and update it as follows:
@extends('layouts.app')
@section('content')
<div class="row">
<div class="col-lg-12 margin-tb">
<div class="pull-left">
<h2>Add New Product www.PHP999.blogspot.in</h2>
</div>
<div class="pull-right">
<a class="btn btn-primary" href="" title="Go back"> <i class="fas fa-backward "></i> </a>
</div>
</div>
</div>
@if ($errors->any())
<div class="alert alert-danger">
<strong>Error!</strong>
<ul>
@foreach ($errors->all() as $error)
<li></li>
@endforeach
</ul>
</div>
@endif
<form action="" method="POST" >
@csrf
<div class="row">
<div class="col-xs-12 col-sm-12 col-md-12">
<div class="form-group">
<strong>Name:</strong>
<input type="text" name="name" class="form-control" placeholder="Name">
</div>
</div>
<div class="col-xs-12 col-sm-12 col-md-12">
<div class="form-group">
<strong>Description:</strong>
<textarea class="form-control" style="height:50px" name="introduction"
placeholder="description"></textarea>
</div>
</div>
<div class="col-xs-12 col-sm-12 col-md-12">
<div class="form-group">
<strong>Price:</strong>
<input type="number" name="price" class="form-control" placeholder="Put the price">
</div>
</div>
<div class="col-xs-12 col-sm-12 col-md-12 text-center">
<button type="submit" class="btn btn-primary">Submit</button>
</div>
</div>
</form>
@endsection
Open the edit.blade.php file and update it as follows:
@extends('layouts.app')
@section('content')
<div class="row">
<div class="col-lg-12 margin-tb">
<div class="pull-left">
<h2>Edit Product</h2>
</div>
<div class="pull-right">
<a class="btn btn-primary" href="" title="Go back"> <i class="fas fa-backward "></i> </a>
</div>
</div>
</div>
@if ($errors->any())
<div class="alert alert-danger">
<strong>Error!</strong>
<ul>
@foreach ($errors->all() as $error)
<li></li>
@endforeach
</ul>
</div>
@endif
<form action="" method="POST">
@csrf
@method('PUT')
<div class="row">
<div class="col-xs-12 col-sm-12 col-md-12">
<div class="form-group">
<strong>Name:</strong>
<input type="text" name="name" value="" class="form-control" placeholder="Name">
</div>
</div>
<div class="col-xs-12 col-sm-12 col-md-12">
<div class="form-group">
<strong>Description</strong>
<textarea class="form-control" style="height:50px" name="description"
placeholder="description"></textarea>
</div>
</div>
<div class="col-xs-12 col-sm-12 col-md-12">
<div class="form-group">
<strong>Price</strong>
<input type="number" name="price" class="form-control" placeholder=""
value="">
</div>
</div>
<div class="col-xs-12 col-sm-12 col-md-12 text-center">
<button type="submit" class="btn btn-primary">Submit</button>
</div>
</div>
</form>
@endsection
Open the show.blade.php file and update it as follows:
@extends('layouts.app')
@section('content')
<div class="row">
<div class="col-lg-12 margin-tb">
<div class="pull-left">
<h2> </h2>
</div>
<div class="pull-right">
<a class="btn btn-primary" href="" title="Go back"> <i class="fas fa-backward "></i> </a>
</div>
</div>
</div>
<div class="row">
<div class="col-xs-12 col-sm-12 col-md-12">
<div class="form-group">
<strong>Name:</strong>
</div>
</div>
<div class="col-xs-12 col-sm-12 col-md-12">
<div class="form-group">
<strong>Description</strong>
</div>
</div>
<div class="col-xs-12 col-sm-12 col-md-12">
<div class="form-group">
<strong>Price</strong>
</div>
</div>
<div class="col-xs-12 col-sm-12 col-md-12">
<div class="form-group">
<strong>Date Created</strong>
</div>
</div>
</div>
@endsection
That's it, we have finished implementing our Laravel 8 CRUD application.
You can serve your Laravel 8 application using the following command:
You can access your app from http://127.0.0.1:8000.