Thursday, December 3, 2020

Laravel 8 CRUD Tutorial by Example


#Laravel is one of the most popular PHP-based frameworks for creating database-driven apps.

#laravel8 #CRUD #EXAMPLE

Step 1 — Installing Laravel 8

Let's get started by installing Laravel 8 using Composer.

Open a new command-line interface and run the following command:

$ composer create-project laravel/laravel=8.0 laravel8app --prefer-dis   

Step 2 — Setting up a MySQL Database

Let's now create a MySQL database that we'll use to persist data in our Laravel application. In your terminal, run the following command to run the mysql client:

$ mysql -u root -p

When prompted, enter the password for your MySQL server when you've installed it.

Next, run the following SQL statement to create a db database:

mysql> create database db;

Open the .env file and update the credentials to access your MySQL database:

DB_CONNECTION=mysql
DB_HOST=127.0.0.1
DB_PORT=3306
DB_DATABASE=db
DB_USERNAME=root
DB_PASSWORD=******

You need to provide the database name, the username and password.

At this point, you can run the migrate command to create your database and a bunch of SQL tables needed by Laravel:

$ php artisan migrate

Note: You can run the migrate command at any other points of your development to add other SQL tables in your database or to later your database if you need to add any changes later.

Step 3 — Creating a Database Migration

We'll be creating a CRUD application with Laravel 8 for a products app so we'll need to create the corresponding SQL table in the database using a migration.

Head back to your terminal and run the following commands:

$ cd laravel8app
$ php artisan make:migration create_products_table --create=products

A migration file will be created inside the database/migrations folder of your product, next we need to add the fields to our database table. A product will have a name, description, price, date created, and date updated.

Open the 2020_09_12_222716_create_products_table.php file that contains the migration class and update it as follows:

<?php

use Illuminate\Database\Migrations\Migration;
use Illuminate\Database\Schema\Blueprint;
use Illuminate\Support\Facades\Schema;

class CreateProductsTable extends Migration
{
    /**
     * Run the migrations.
     *
     * @return void
     */
    public function up()
    {
        Schema::create('products', function (Blueprint $table) {
            $table->id();
            $table->string('name', 255)->nullable();
            $table->string('description', 500)->nullable();
            $table->decimal('price', 22)->nullable()->default(0.00);
            $table->timestamp('created_at')->useCurrent();
            $table->timestamp('updated_at')->nullable();
        });
    }

    /**
     * Reverse the migrations.
     *
     * @return void
     */
    public function down()
    {
        Schema::dropIfExists('products');
    }
}

To avoid running into errors, you need to specify the default string length before running your migration.

Open the app/Providers/AppServiceProvider.php file and add Schema::defaultstringLength(191) as follows:

<?php

namespace App\Providers;

use Illuminate\Support\ServiceProvider;
use Illuminate\Support\Facades\Schema;


class AppServiceProvider extends ServiceProvider
{
    /**
     * Register any application services.
     *
     * @return void
     */
    public function register()
    {
        //
    }

    /**
     * Bootstrap any application services.
     *
     * @return void
     */
    public function boot()
    {
        Schema::defaultStringLength(191);
    }
}

Next, head back to your terminal and run the following command:

$ php artisan migrate

This will add the fields to our database table.

Step 4 — Adding a Resource Route

After creating our database table using a Laravel 8 migration. We'll next need to add routes for our CRUD operations.

Open the routes\web.php file and add our resource route as follows:

<?php

use Illuminate\Support\Facades\Route;
use App\Http\Controllers\ProductController;

Route::get('/', function () {
    return view('welcome');
});


Route::resource('products', ProductController::class);

Step 5 — Adding a Laravel 8 Controller and Model

Next, we need to create a Laravel controller and model by running the following command:

$ php artisan make:controller ProductController --resource --model=Product

You'll be prompted if you want to create the Product model because it does not exist. Type yes and it will create the model and controller.

Open the app/Http/Controllers/ProductController.php file and update it as follows:

<?php
namespace App\Http\Controllers;

use App\Models\Product;
use Illuminate\Http\Request;

class ProductController extends Controller
{
    /**
     * Display a listing of the resource.
     *
     * @return \Illuminate\Http\Response
     */
    public function index()
    {
        $products = Product::latest()->paginate(5);

        return view('products.index', compact('products'))
            ->with('i', (request()->input('page', 1) - 1) * 5);
    }

    /**
     * Show the form for creating a new resource.
     *
     * @return \Illuminate\Http\Response
     */
    public function create()
    {
        return view('products.create');
    }

    /**
     * Store a newly created resource in storage.
     *
     * @param  \Illuminate\Http\Request  $request
     * @return \Illuminate\Http\Response
     */
    public function store(Request $request)
    {
        $request->validate([
            'name' => 'required',
            'description' => 'required',
            'price' => 'required'
        ]);

        Product::create($request->all());

        return redirect()->route('products.index')
            ->with('success', 'Product created successfully.');
    }

    /**
     * Display the specified resource.
     *
     * @param  \App\Models\Product  $product
     * @return \Illuminate\Http\Response
     */
    public function show(Product $product)
    {
        return view('products.show', compact('product'));
    }

    /**
     * Show the form for editing the specified resource.
     *
     * @param  \App\Models\Product  $product
     * @return \Illuminate\Http\Response
     */
    public function edit(Product $product)
    {
        return view('products.edit', compact('product'));
    }
    /**
     * Update the specified resource in storage.
     *
     * @param  \Illuminate\Http\Request  $request
     * @param  \App\Models\product  $product
     * @return \Illuminate\Http\Response
     */
    public function update(Request $request, Product $product)
    {
        $request->validate([
            'name' => 'required',
            'description' => 'required',
            'price' => 'required'
        ]);
        $product->update($request->all());

        return redirect()->route('products.index')
            ->with('success', 'Product updated successfully');
    }
    /**
     * Remove the specified resource from storage.
     *
     * @param  \App\Models\Product  $product
     * @return \Illuminate\Http\Response
     */
    public function destroy(Product $product)
    {
        $product->delete();

        return redirect()->route('products.index')
            ->with('success', 'Product deleted successfully');
    }
}


Laravel 8 makes use of a Models folder for storing model files.

Open the app/Models/Product.php, add the following functions and the fillable, the fillable are the fields in the database that a user can fill:

<?php

namespace App\Models;

use Illuminate\Database\Eloquent\Factories\HasFactory;
use Illuminate\Database\Eloquent\Model;

class Product extends Model
{
    use HasFactory;

    protected $table = 'products';
    public $timestamps = true;

    protected $casts = [
        'price' => 'float'
    ];

    protected $fillable = [
        'name',
        'description',
        'price',
        'created_at'
    ];
}

Step 6 — Adding your Larevl 8 Blade Views

Laravel makes use of the blade templating system for views.

Inside the resources/views folder, create two Layouts and Products folders.

Update yhe Layouts/App.blade.php file with the following content:

<html>

<head>
    <title>App Name - @yield('title')</title>

    <!-- Bootstrap -->
    <link href="https://cdnjs.cloudflare.com/ajax/libs/twitter-bootstrap/4.0.0-alpha/css/bootstrap.css" rel="stylesheet">

    <!-- Font Awesome JS -->
    <script defer src="https://use.fontawesome.com/releases/v5.0.13/js/solid.js"
        integrity="sha384-tzzSw1/Vo+0N5UhStP3bvwWPq+uvzCMfrN1fEFe+xBmv1C/AtVX5K0uZtmcHitFZ" crossorigin="anonymous">
    </script>
    <script defer src="https://use.fontawesome.com/releases/v5.0.13/js/fontawesome.js"integrity="sha384-6OIrr52G08NpOFSZdxxz1xdNSndlD4vdcf/q2myIUVO0VsqaGHJsB0RaBE01VTOY" crossorigin="anonymous">
    </script>

    <style>
        .footer {
            position: fixed;
            left: 0;
            bottom: 0;
            width: 100%;
            background-color: #9C27B0;
            color: white;
            text-align: center;
        }

    </style>

</head>

<body>
    @section('sidebar')

    @show

    <div class="container">
        @yield('content')
    </div>
</body>

</html>

Open the Index.blade.php and update it as follows:

@extends('layouts.app')

@section('content')
    <div class="row">
        <div class="col-lg-12 margin-tb">
            <div class="pull-left">
                <h2>Laravel 8 CRUD Example </h2>
            </div>
            <div class="pull-right">
                <a class="btn btn-success" href="" title="Create a product"> <i class="fas fa-plus-circle"></i>
                    </a>
            </div>
        </div>
    </div>

    @if ($message = Session::get('success'))
        <div class="alert alert-success">
            <p></p>
        </div>
    @endif

    <table class="table table-bordered table-responsive-lg">
        <tr>
            <th>No</th>
            <th>Name</th>
            <th>description</th>
            <th>Price</th>
            <th>Date Created</th>
            <th>Actions</th>
        </tr>
        @foreach ($products as $product)
            <tr>
                <td></td>
                <td></td>
                <td></td>
                <td></td>
                <td></td>
                <td>
                    <form action="" method="POST">

                        <a href="" title="show">
                            <i class="fas fa-eye text-success  fa-lg"></i>
                        </a>

                        <a href="">
                            <i class="fas fa-edit  fa-lg"></i>
                        </a>

                        @csrf
                        @method('DELETE')

                        <button type="submit" title="delete" style="border: none; background-color:transparent;">
                            <i class="fas fa-trash fa-lg text-danger"></i>
                        </button>
                    </form>
                </td>
            </tr>
        @endforeach
    </table>

    {!! $products->links() !!}

@endsection

Open the create.blade.php file and update it as follows:

@extends('layouts.app')

@section('content')
    <div class="row">
        <div class="col-lg-12 margin-tb">
            <div class="pull-left">
                <h2>Add New Product www.PHP999.blogspot.in</h2>
            </div>
            <div class="pull-right">
                <a class="btn btn-primary" href="" title="Go back"> <i class="fas fa-backward "></i> </a>
            </div>
        </div>
    </div>

    @if ($errors->any())
        <div class="alert alert-danger">
            <strong>Error!</strong> 
            <ul>
                @foreach ($errors->all() as $error)
                    <li></li>
                @endforeach
            </ul>
        </div>
    @endif
    <form action="" method="POST" >
        @csrf

        <div class="row">
            <div class="col-xs-12 col-sm-12 col-md-12">
                <div class="form-group">
                    <strong>Name:</strong>
                    <input type="text" name="name" class="form-control" placeholder="Name">
                </div>
            </div>
            <div class="col-xs-12 col-sm-12 col-md-12">
                <div class="form-group">
                    <strong>Description:</strong>
                    <textarea class="form-control" style="height:50px" name="introduction"
                        placeholder="description"></textarea>
                </div>
            </div>
            <div class="col-xs-12 col-sm-12 col-md-12">
                <div class="form-group">
                    <strong>Price:</strong>
                    <input type="number" name="price" class="form-control" placeholder="Put the price">
                </div>
            </div>
            <div class="col-xs-12 col-sm-12 col-md-12 text-center">
                <button type="submit" class="btn btn-primary">Submit</button>
            </div>
        </div>

    </form>
@endsection

Open the edit.blade.php file and update it as follows:

@extends('layouts.app')

@section('content')
    <div class="row">
        <div class="col-lg-12 margin-tb">
            <div class="pull-left">
                <h2>Edit Product</h2>
            </div>
            <div class="pull-right">
                <a class="btn btn-primary" href="" title="Go back"> <i class="fas fa-backward "></i> </a>
            </div>
        </div>
    </div>

    @if ($errors->any())
        <div class="alert alert-danger">
            <strong>Error!</strong>
            <ul>
                @foreach ($errors->all() as $error)
                    <li></li>
                @endforeach
            </ul>
        </div>
    @endif

    <form action="" method="POST">
        @csrf
        @method('PUT')

        <div class="row">
            <div class="col-xs-12 col-sm-12 col-md-12">
                <div class="form-group">
                    <strong>Name:</strong>
                    <input type="text" name="name" value="" class="form-control" placeholder="Name">
                </div>
            </div>
            <div class="col-xs-12 col-sm-12 col-md-12">
                <div class="form-group">
                    <strong>Description</strong>
                    <textarea class="form-control" style="height:50px" name="description"
                        placeholder="description"></textarea>
                </div>
            </div>
            <div class="col-xs-12 col-sm-12 col-md-12">
                <div class="form-group">
                    <strong>Price</strong>
                    <input type="number" name="price" class="form-control" placeholder=""
                        value="">
                </div>
            </div>
            <div class="col-xs-12 col-sm-12 col-md-12 text-center">
                <button type="submit" class="btn btn-primary">Submit</button>
            </div>
        </div>

    </form>
@endsection

Open the show.blade.php file and update it as follows:

@extends('layouts.app')


@section('content')
    <div class="row">
        <div class="col-lg-12 margin-tb">
            <div class="pull-left">
                <h2>  </h2>
            </div>
            <div class="pull-right">
                <a class="btn btn-primary" href="" title="Go back"> <i class="fas fa-backward "></i> </a>
            </div>
        </div>
    </div>

    <div class="row">
        <div class="col-xs-12 col-sm-12 col-md-12">
            <div class="form-group">
                <strong>Name:</strong>

            </div>
        </div>
        <div class="col-xs-12 col-sm-12 col-md-12">
            <div class="form-group">
                <strong>Description</strong>

            </div>
        </div>
        <div class="col-xs-12 col-sm-12 col-md-12">
            <div class="form-group">
                <strong>Price</strong>

            </div>
        </div>
        <div class="col-xs-12 col-sm-12 col-md-12">
            <div class="form-group">
                <strong>Date Created</strong>

            </div>
        </div>
    </div>
@endsection

That's it, we have finished implementing our Laravel 8 CRUD application.

You can serve your Laravel 8 application using the following command:

$ php artisan serve

You can access your app from http://127.0.0.1:8000.

Monday, October 5, 2020

Laravel 8 Auth (Registration and Login)


Laravel 8 Auth (Registration and Login)


Previously, in Laravel 7 and Laravel 6 in other to do user authentication, we use an artisan command composer require laravel/ui while from Laravel 5.9 downwards uses php artisan make:auth

In Laravel 8, there is a major change in that area in the sense that many things are introduced and a lot of configurations have been done to get you started and not minding the boilerplate of your application, one of those changes is the introduction of Jetstream, Laravel Jetstream is a beautifully designed application scaffolding for Laravel. A major shift from the legacy authentication UI of Laravel.

Step 1: Install a new Laravel app

composer create-project laravel/laravel projectapp --prefer-dist

The command above only install Laravel, however, if you want to install Jetstream together then either


Laravel new projectapp --jet

or

composer require laravel/jetstream

we are going with the first of only installing Laravel, I want to explain other things in the process.

Before we migrate, let’s catch one bug before it throws an error, go to App/Providers/AppServiceProvider.php
and add

Schema::defaultstringLength(191);

to the boot function, also add

use Illuminate\Support\Facades\Schema;

to the top

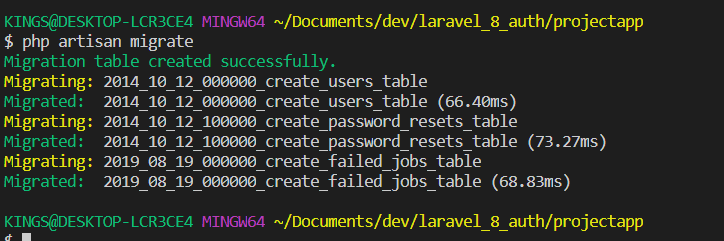
Step 3: Migration

php artisan migrate

migration file

Step 4: install Jetstream

composer require laravel/jetstream


Step 5: Install livewire or inertia

We need to install one of the stacks, either a livewire or an inertia stack, in this tutorial, I will only be using livewire because it set up everything I need for the app

php artisan jetstream:install livewire 


As suggested, run npm install && npm run dev to build all the javaScript files and CSS we need for our app. On successful build, Laravel will send a notification at the bottom left.


Step 5: Migrate the new table that is created

php artisan migrate


Let’s run our app

php artisan serve 

Sunday, November 26, 2017

How do I delete a Git branch both locally and remotely?


To delete Locally - (Normal),
 
git branch -d my_branch
 
If your branch in rebasing/merging progress and that was not done properly means, you will get an error Rebase/Merge in progress so in that case, you won't be able to delete your branch.

So either your need to solve rebasing/merging otherwise you can do force Delete by using,

git branch -D my_branch
 
To delete in Remote:

git push --delete origin my_branch
 
can do the same using ,

git push origin :my_branch   # easy to remember both will do the same.

Wednesday, November 22, 2017

hooks in codeigniter

What is hooks in codeigniter and how it works

CodeIgniter’s Hooks feature provides a means to tap into and modify the inner workings of the framework without hacking the core files. When CodeIgniter runs it follows a specific execution process, diagramed in the Application Flow page. There may be instances, however, where you’d like to cause some action to take place at a particular stage in the execution process. For example, you might want to run a script right before your controllers get loaded, or right after, or you might want to trigger one of your own scripts in some other location.

Hook Points

The following is a list of available hook points.
  • pre_system Called very early during system execution. Only the benchmark and hooks class have been loaded at this point. No routing or other processes have happened.
  • pre_controller Called immediately prior to any of your controllers being called. All base classes, routing, and security checks have been done.
  • post_controller_constructor Called immediately after your controller is instantiated, but prior to any method calls happening.
  • post_controller Called immediately after your controller is fully executed.
  • display_override Overrides the _display() method, used to send the finalized page to the web browser at the end of system execution. This permits you to use your own display methodology. Note that you will need to reference the CI superobject with $this->CI =& get_instance() and then the finalized data will be available by calling $this->CI->output->get_output().
  • cache_override Enables you to call your own method instead of the _display_cache() method in the Output Library. This permits you to use your own cache display mechanism.
post_system Called after the final rendered page is sent to the browser, at the end of system execution after the finalized data is sent to the browser.


INTERVIEW QUESTIONS .....


What is sql injection ? ( top interview Question)

What is sql injection ?

SQL injection is a code injection technique that might destroy your database.
SQL injection is one of the most common web hacking techniques.
SQL injection is the placement of malicious code in SQL statements, via web page input.


What is the difference between primary key and unique key ?
Primary Key
Unique Key
Definition
Primary key is a type of a unique key. This is the key that is allowed to migrate to other entities to define the relationships that exist among the entities.
A unique key is a set of zero, one, or more attributes. The value(s) of these attributes are required to be unique for each tuple (row) in a relation. The value, or combination of values, of unique key attributes for any tuple should not be repeated for any other tuple in that relation.
Used in
Relational Database Management Systems such as MySQL, Oracle, etc.
Null Values
Does not accept any null values
Accepts only one null value in the table
Type of Index
Is a clustered index and data in the database table is physically organized in the sequence of clustered index           
Is a unique non-clustered index
Number of Keys allowed
Only one primary key in a table
Can have more than one unique key in a table
Convertible
Can be made into a foreign key into another table

What is the difference between char and varchar  ?
CHAR Data Type is a Fixed Length Data Type. For example if you declare a variable/column of CHAR (10) data type, then it will always take 10 bytes irrespective of whether you are storing 1 character or 10 character in this variable or column. And in this example as we have declared this variable/column as CHAR(10), so we can store max 10 characters in this column.
On the other hand VARCHAR is a variable length Data Type. For example if you declare a variable/column of VARCHAR (10) data type, it will take the no. of bytes equal to the number of characters stored in this column. So, in this variable/column if you are storing only one character then it will take only one byte and if we are storing 10 characters then it will take 10 bytes. And in this example as we have declared this variable/column as VARCHAR (10), so we can store max 10 characters in this column.
if you like our post you can contribute us by Click Here

What is csrf and xss clean?

          CSRF :

Cross-site request forgeries are a type of malicious exploit whereby unauthorized commands are performed on behalf of an authenticated user.

Laravel automatically generates a CSRF "token" for each active user session managed by the application. This token is used to verify that the authenticated user is the one actually making the requests to the application

XSS clean :

the attack is basically a type of code injection attack which is made possible by incorrectly validating user data, which usually gets inserted into the page through a web form or using an altered hyperlink. The code injected can be any malicious client-side code, such as JavaScript, VBScript, HTML, CSS, Flash, and others. The code is used to save harmful data on the server or perform a malicious action within the user’s browser.

Unfortunately, cross-site scripting attacks occurs mostly, because developers are failing to deliver secure code. Every PHP programmer has the responsibility to understand how attacks can be carried out against their PHP scripts to exploit possible security vulnerabilities. Reading this article, you’ll find out more about cross-site scripting attacks and how to prevent them in your code.

Preventing Cross-Site Scripting Attacks

  •     Data Validation

  •     Data Sanitization

  •     Output Escaping

  • Htmlspecialchars :

    • The htmlspecialchars() function converts some predefined characters to HTML entities.

  • HTML entities

    • The htmlentities() function converts characters to HTML entities.

  • Strip_tags

    • The strip_tags() function strips a string from HTML, XML, and PHP tags.

    • Note: HTML comments are always stripped. This cannot be changed with the allow parameter.

    • Note: This function is binary-safe.

      --------------------------------------------------------------------------------------------


Trim()

The trim() function removes whitespace and other predefined characters from both sides of a string.


ltrim() - Removes whitespace or other predefined characters from the left side of a string

rtrim() - Removes whitespace or other predefined characters from the right side of a string

Monday, November 20, 2017

Change an HTML5 input's placeholder color with CSS

There are three different implementations: pseudo-elements, pseudo-classes, and nothing.
  • WebKit, Blink (Safari, Google Chrome, Opera 15+) and Microsoft Edge are using a pseudo-element: ::-webkit-input-placeholder. 
  • Mozilla Firefox 4 to 18 is using a pseudo-class: :-moz-placeholder (one colon). 
  • Mozilla Firefox 19+ is using a pseudo-element: ::-moz-placeholder, but the old selector will still work for a while. 
  • Internet Explorer 10 and 11 are using a pseudo-class: :-ms-input-placeholder. 
Internet Explorer 9 and lower does not support the placeholder attribute at all, while Opera 12 and lower do not support any CSS selector for placeholders.
The discussion about the best implementation is still going on. Note the pseudo-elements act like real elements in the Shadow DOM. A padding on an input will not get the same background color as the pseudo-element.

So we need separate rules for each browser. Otherwise the whole group would be ignored by all browsers.

::-webkit-input-placeholder { /* WebKit, Blink, Edge */
    color:    #909;
}
:-moz-placeholder { /* Mozilla Firefox 4 to 18 */
   color:    #909;
   opacity:  1;
}
::-moz-placeholder { /* Mozilla Firefox 19+ */
   color:    #909;
   opacity:  1;
}
:-ms-input-placeholder { /* Internet Explorer 10-11 */
   color:    #909;
}
::-ms-input-placeholder { /* Microsoft Edge */
   color:    #909;
}
<input placeholder="php999 is great!">

How to Host a Laravel Project on Hostinger’s hPanel: A Step-by-Step Guide

How to Host a Laravel Project on Hostinger’s hPanel: A Step-by-Step Guide If you're looking to host a Laravel project on Hostinger’s hPa...